Movements Report
Objective: Gain an understanding of how to generate a Movements Report.
From the Navigation Sidebar, select 'Accounting' and from the Navigation Dropdown, select the relevant ledger, either 'Fair Value' or 'Historical'.

Next, select the 'Financial Year' tab to display the available reports, including the Movements report.
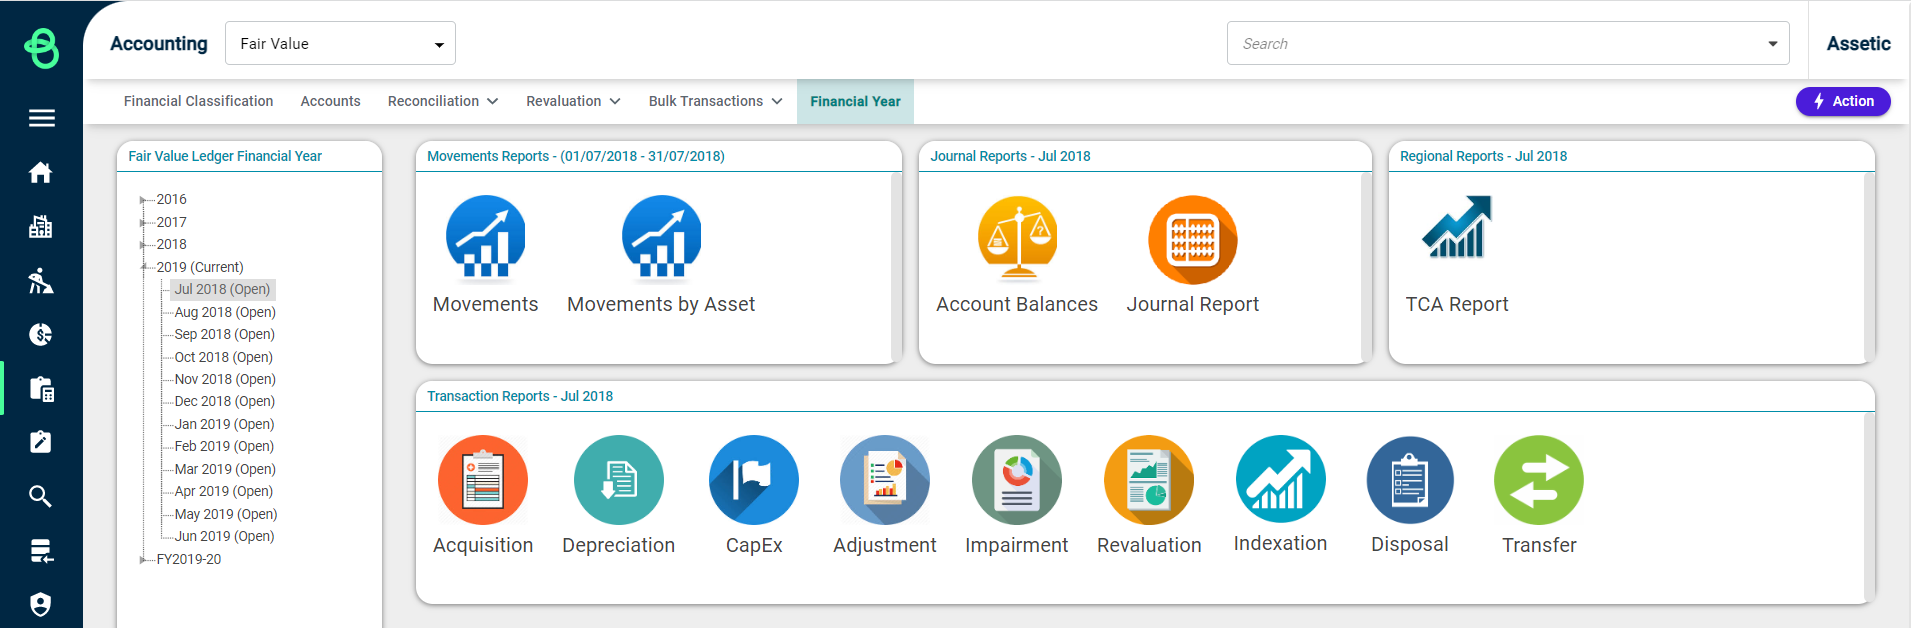
Select a period of time from the hierarchy tree on the left-hand side, then select 'Movements' report from the panel to load the following screen:
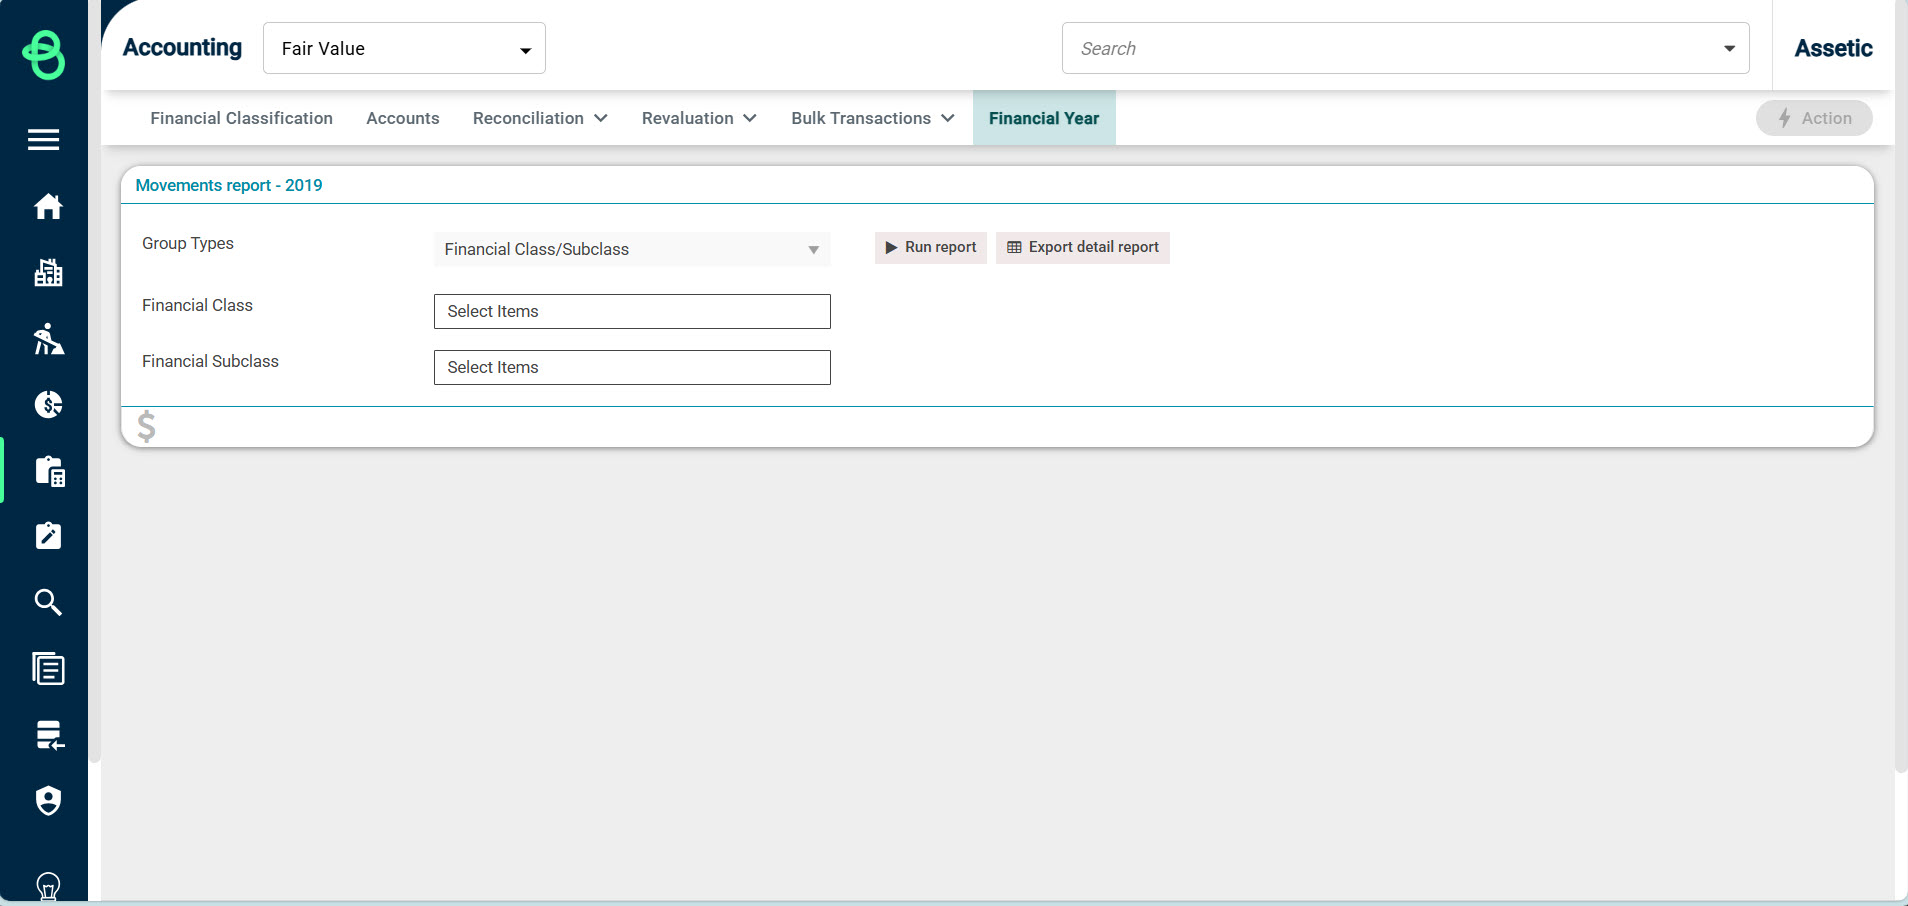
From the 'Group Types' drop-down, users can select either 'Financial Class/Sub-class', 'Asset Category', or (only when a financial month is selected, not a financial year) 'Financial Class/Sub-class (year to month)', depending on the type that is needed to be grouped to run the report.
When selecting 'Financial Class/Sub-class' or 'Financial Class/Sub-class (year-to-month)', users can select multiple Financial Classes at once.
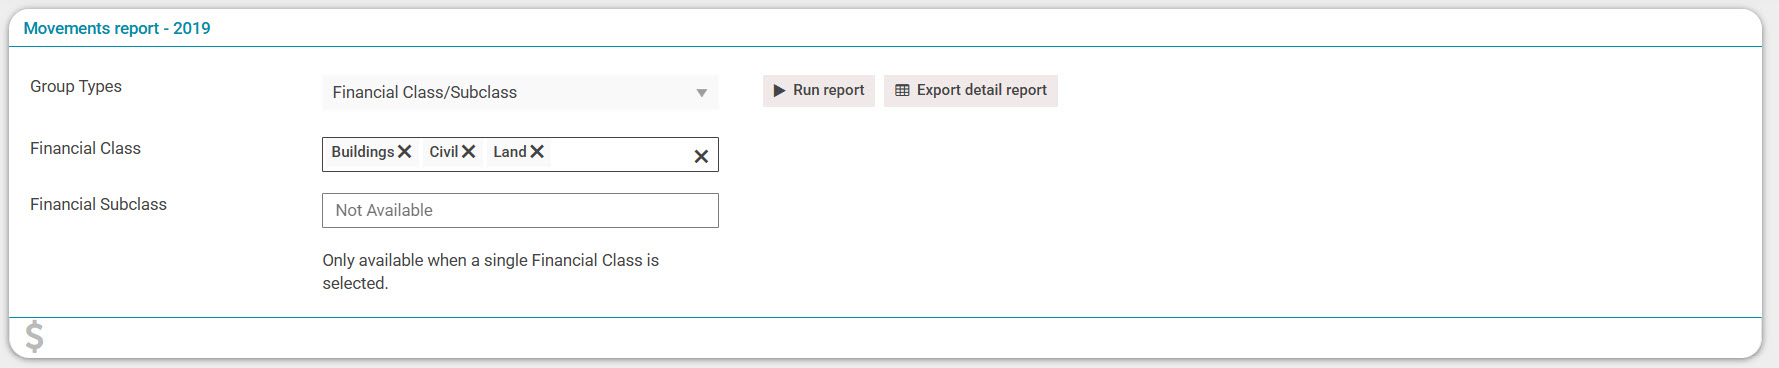
Alternatively, a single Financial Class can be selected, along with a selection of Subclasses
from that Class.
Movements Report - Financial Class/Subclass
Selecting 'Financial Class/Subclass' group type to run report generates the Movements report as follows:
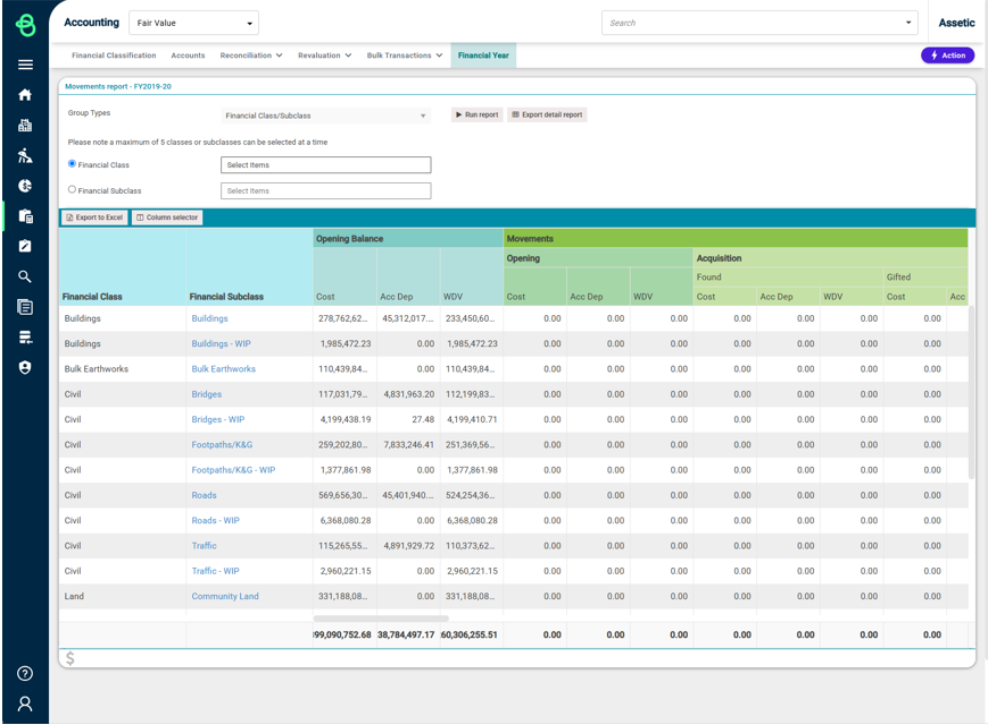
The 'Opening Balance' section shows the Opening Balances for a Financial Year or Financial Period, while the 'Opening' section in 'Movements' shows any Opening Transactions.
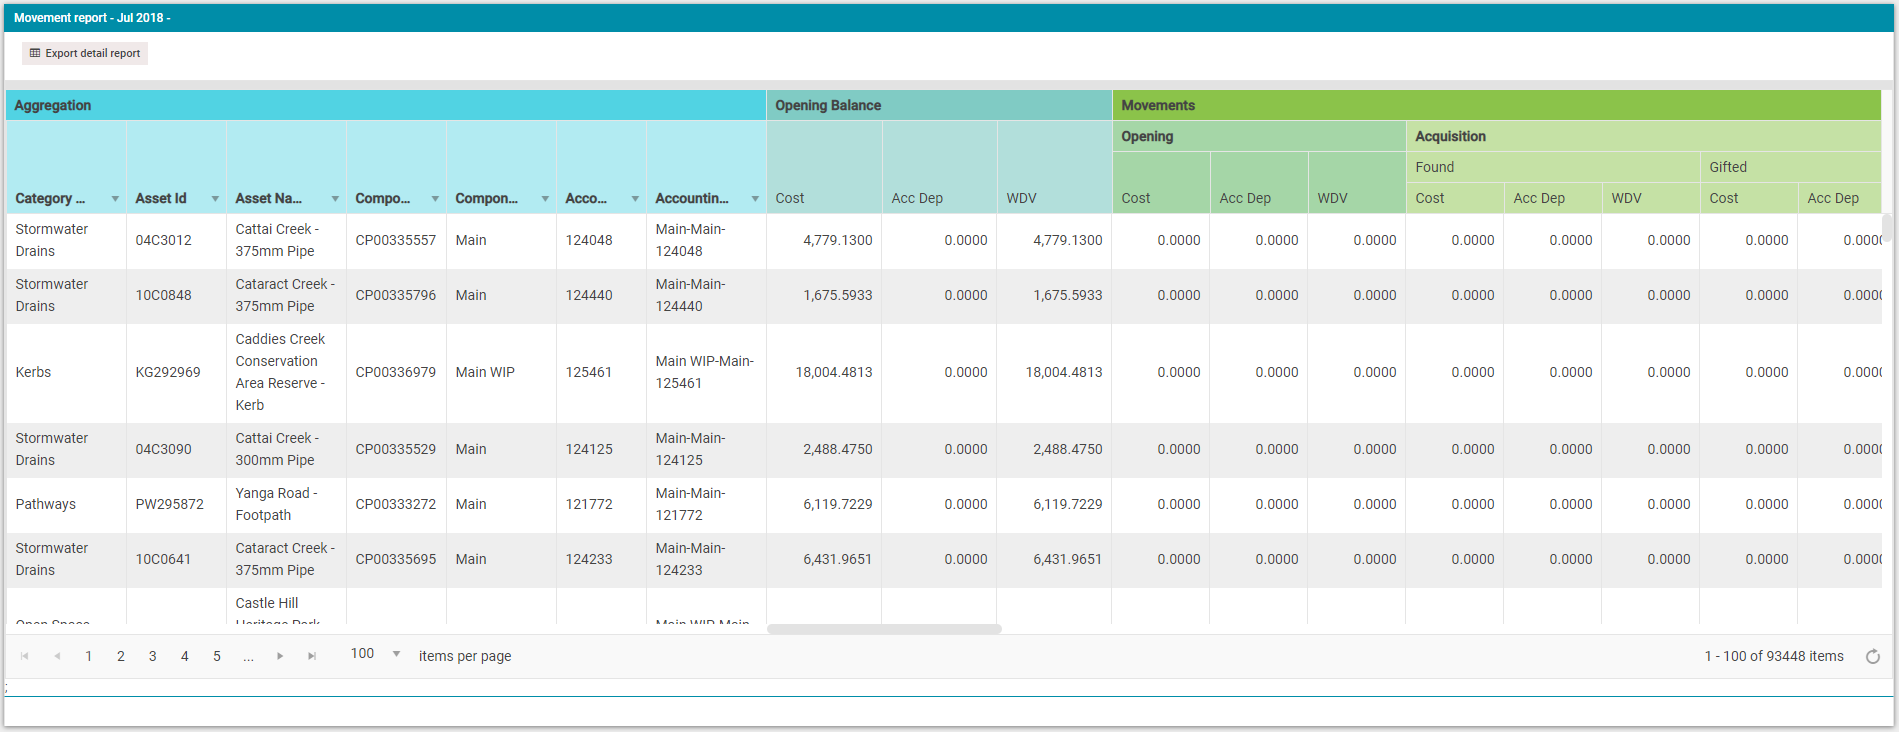
Selecting a record in the 'Financial Subclass' column navigates to a new page which shows a Movements report for the selected Financial Subclass, including Asset Splitting information:
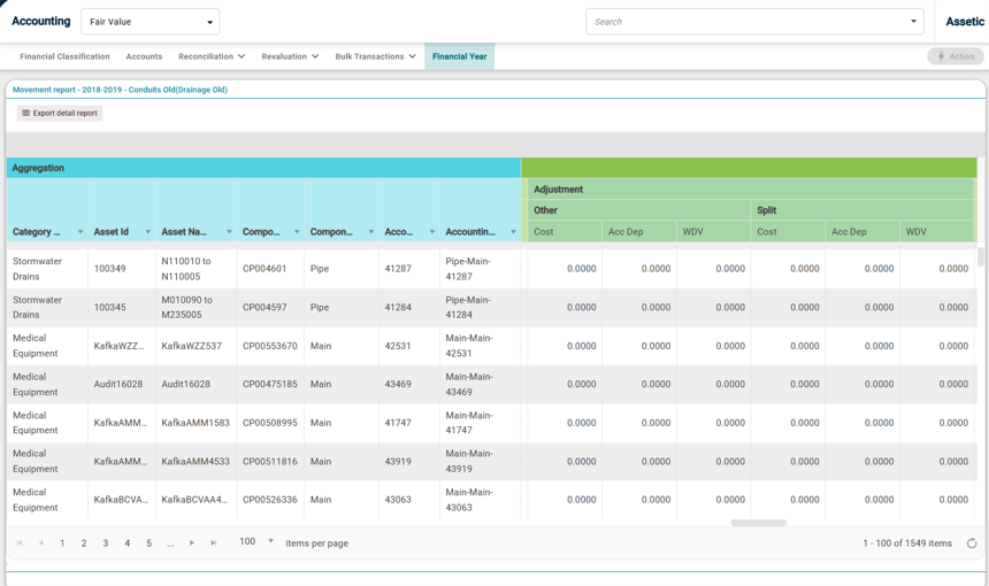
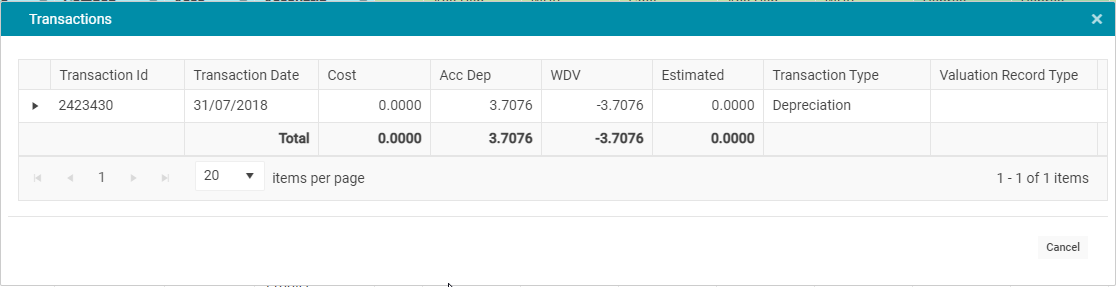
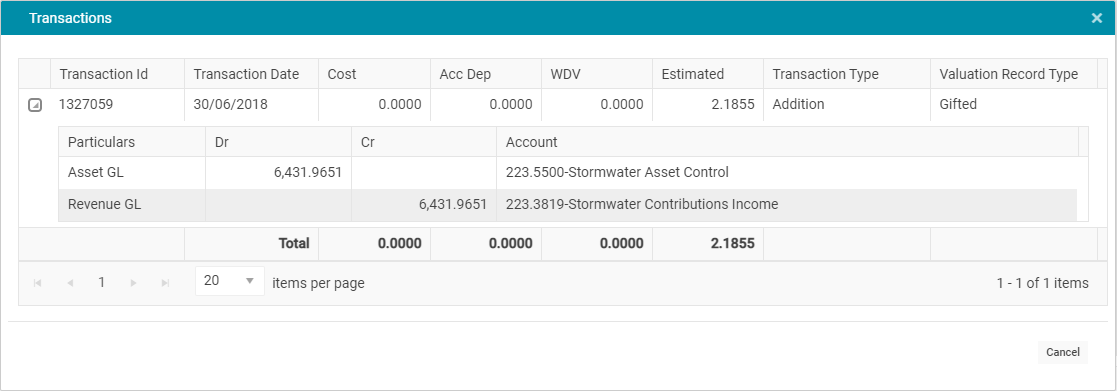
Transaction and Journal level details can be viewed via further drill-down reporting by clicking on any movements value greater than zero, except values within the columns Opening Balance Section, Movement Opening Section and Closing Balance Section.
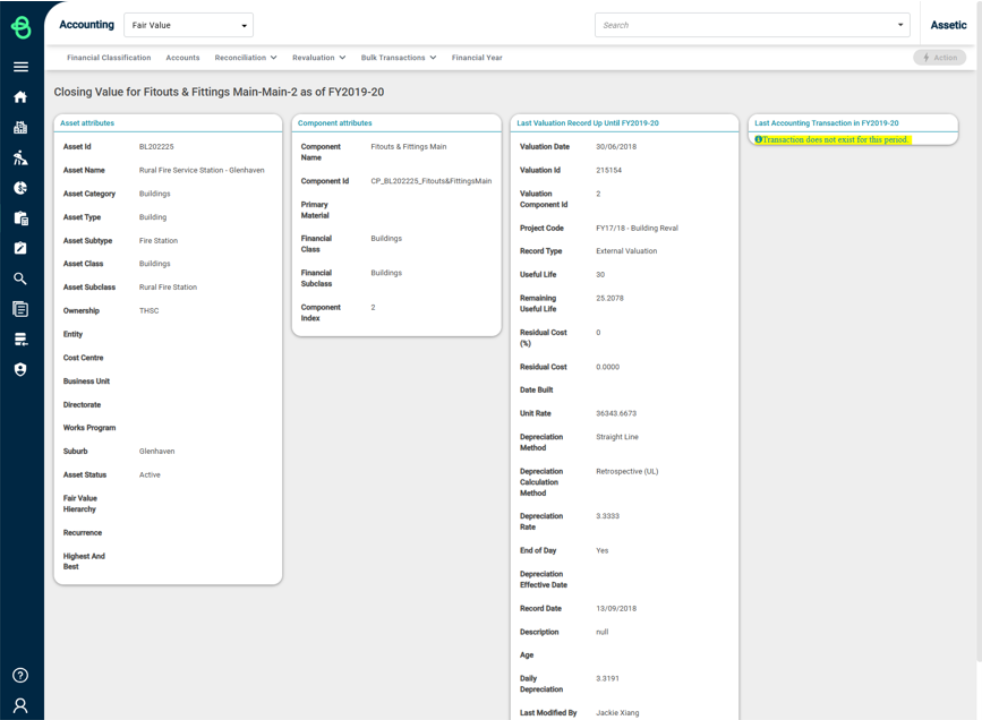
The closing value details for a component can be viewed by clicking on the hyperlink value in the Written Down Value (WDV) by clicking on any closing value greater than zero. The results will be displayed in another window and will provide the user with a summary of the Component's most recent Valuation and Accounting transactions for the Movement's report financial year.
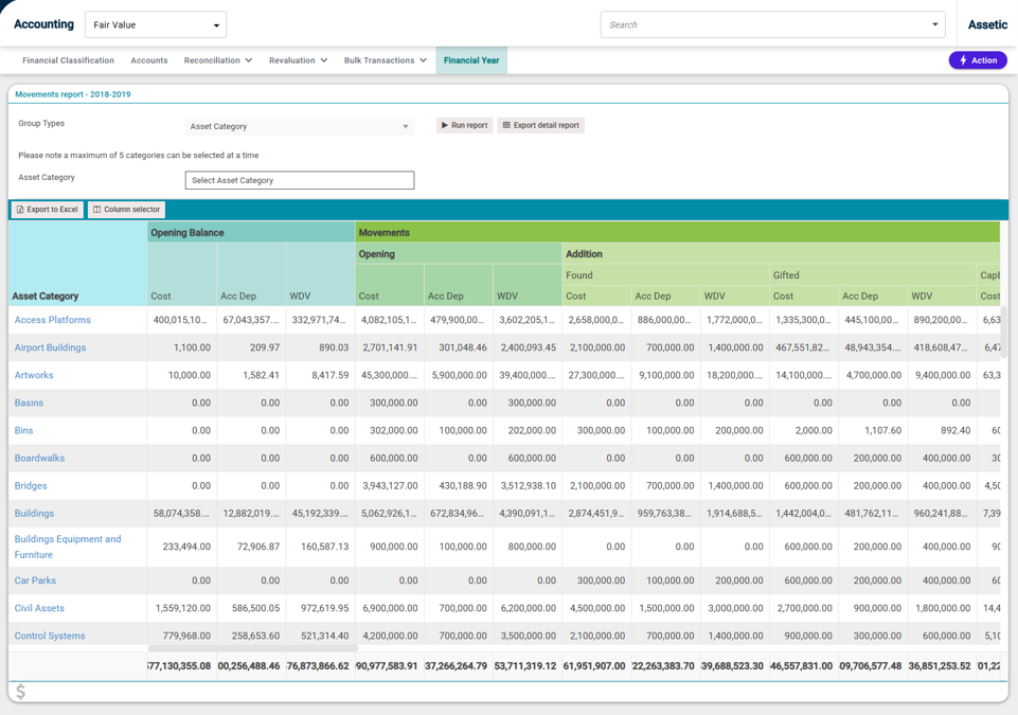
Movements Report - Asset Category
Selecting the 'Asset Category' group type to run report generates the following Movements report:
Select the available record in the 'Asset Category' column to navigate to a new page which shows a Movements report for the selected Asset Category. The below example shows the page for the 'Roads' category.
Transaction and Journal level details can be viewed via further drill-down reporting by clicking on any Movements column value greater than zero, except values within the columns Opening Balance Section, Movement Opening Section and Closing Balance Section.
Managing Movements Report Columns
Select the Column Selector button on  on the left-hand side of the full Movements report and a new pop-up is displayed as shown below:
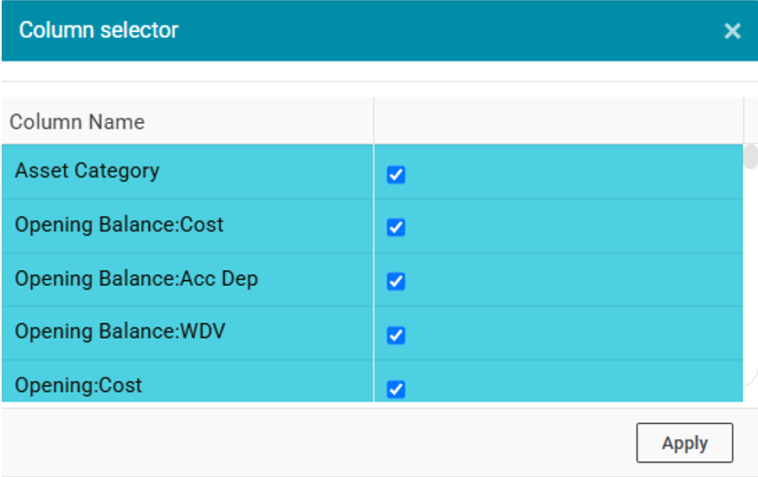
From this window, users can select the columns that are required to be included in the Movements report. Once this is done, click on the 'Apply' button to generate the report with the selected columns. Note that this applies to the Movements report, not the Asset Category drill-down.
Exporting Movements Report
To export the generated reports, either click on 'Export excel report' to export the Movements report as it appears in the UI, or click on the 'Export detail report' button available against the Movements report and the drill-down Financial Sub-class/Asset Category reports to export a detailed version of the Movement's report.
Performing the 'Export detail report' for the Group Type 'Financial Class/Sub-class (year to month)' will export all movements aggregated to the selected month of that financial year.
A confirmation message will be displayed as follows:

These reports can be downloaded from the Exported reports grid against that particular Financial Year within the Financial Year tab:
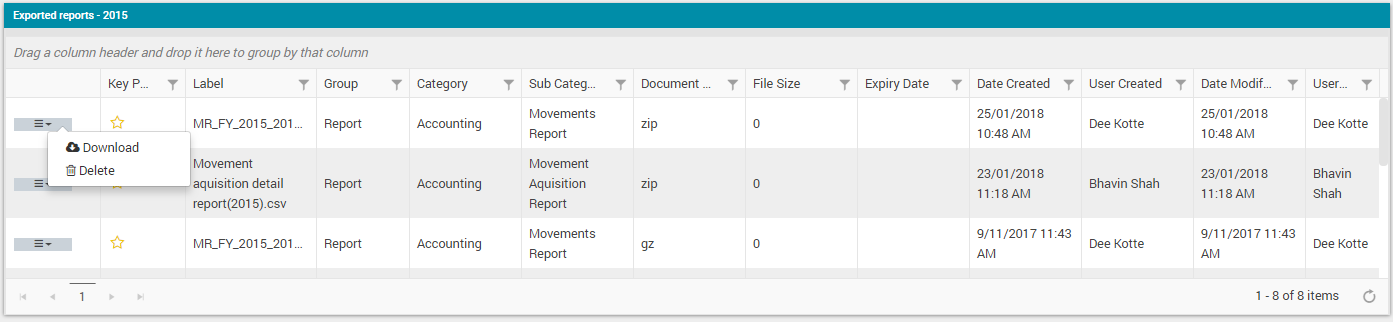
To open the exported report, click 'Download' and the report downloads locally in csv.gz format. Then open the local folder that the file was downloaded to, and locate the .gz file.
Next, right-click to select the Unzip tool and extract (Unzip) the file.
The following window appears:
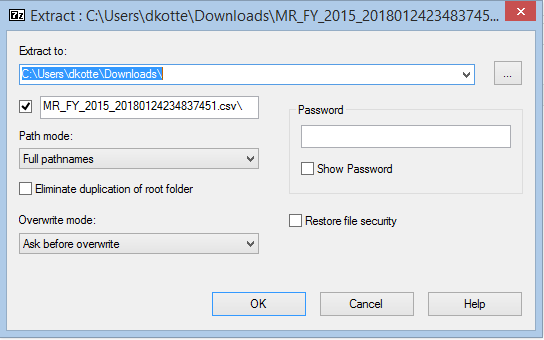
In the 'Extract to' dialog, enter or browse to the folder path where the file is to be extracted to and select 'OK' to start the extraction. This will extract a .csv file in the folder that has been selected, with the same file name as the .zip file.
If this exported file is no longer needed, simply click on 'Delete' from the menu icon. A pop-up message is shown confirming the action.
Next Steps: To gain a more detailed understanding of Brightly Assetic Accounting, refer to the remaining articles in the Assetic Accounting section.
